The Contact Center Client
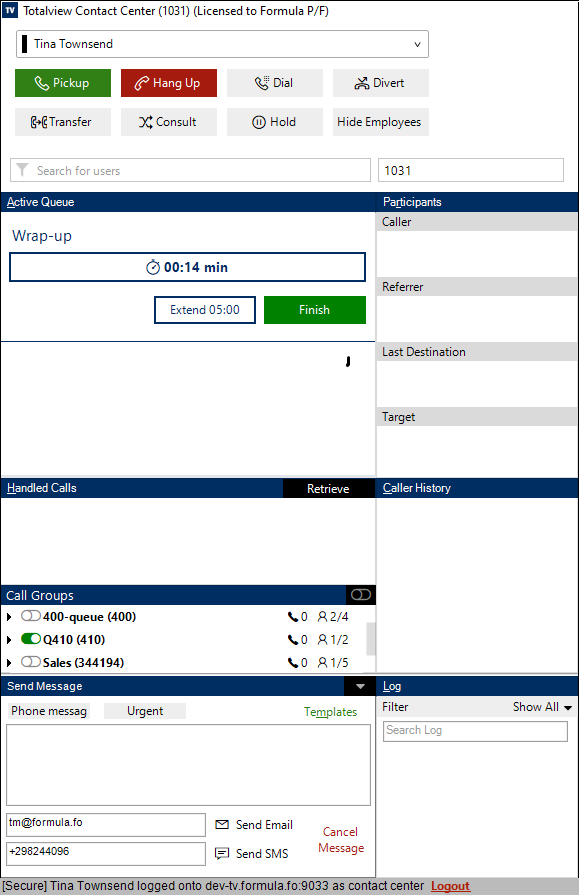
The Contact Center client is intended for use with call groups. If the logged in user has switchboard privileges, it has all the functionality of the switchboard (See The Switchboard Client), if the user does not have switchboard privileges, then the client still looks like a switchboard client, but the user can only change his own state and appointments.
In addition, it supports automatic wrap-up time, and an overview of the users’ call groups.
Automatic wrap-up
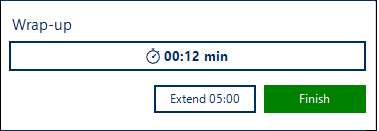
When wrap-up is enabled, it will automatically be activated when an incoming call is ended. While in wrap-up the user will not receive any call from call groups. Direct calls will not be affected.
In Totalview admin you can set up automatic wrap-up time, including how long the wrap-up is initially and how much the time is extended, when the user selects to extend the wrap-up time.
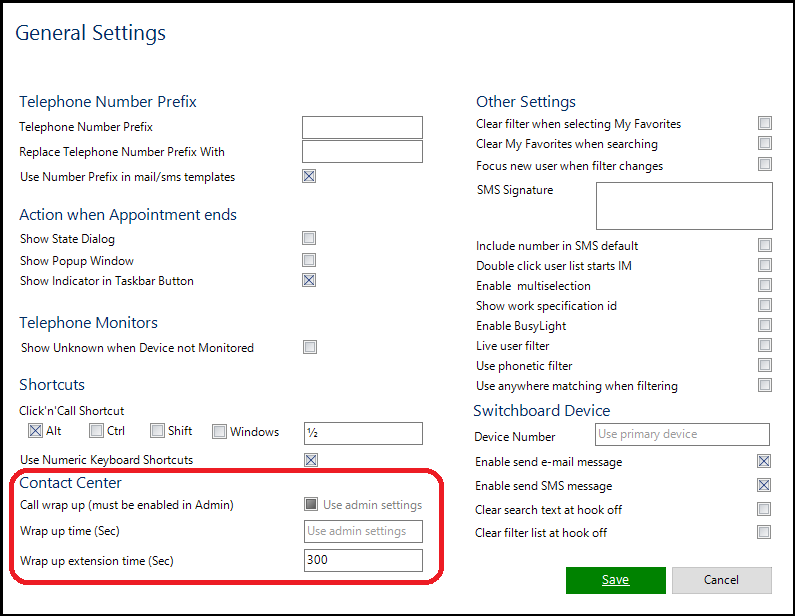
If wrap-up is enabled in the admin module it can be overwritten by the Contact Center in general settings.
Call-groups
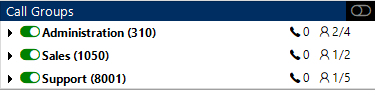
The call groups window displays which call groups the user is member of. Use the sliders to log in/out of the call groups. The top right slider can be used to log in/out of all call groups (only for specific PBX types. See here)
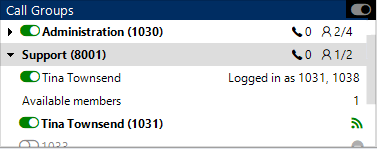
Expanding a call group will show all the members, and their log in/out state
The Log
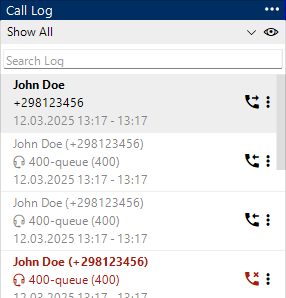
The log shows the ended calls. When client is started, the log includes 7 days of call log entries (call log).

After the contact center is started, calls that end will also be shown in the log (ended calls).
When an ended call is selected Participants, Caller History, and Send Message sections are updated to show the information related to the selected item. If you have started to write a message but have not sent it yet, this is indicated with a red speech bubble icon.
Searching can be done by entering a search text into the text field. You can also click on the down chevron to select between incoming, outgoing… only. In addition, you can click the eye icon to show/hide all entries with colleagues (i.e. those that have a phone number registered osn a user in Totalview)
We always attempt to link ended calls with call log entries to ensure a uniform way of displaying relevant data.
Unlinked Calls
When it is not possible to link the calls, the display format is:
1st line: The caller’s name (if available); otherwise, the phone number.
2nd line: The recipient’s name (if available); otherwise, the phone number.
3rd line: The start and end date of the call.
Linked Calls
When the calls are successfully linked, the display format is:
1st line: The name of the calling/called person.
2nd line: The phone number of the calling/called person.
3rd line: The start and end date of the call.
Note
Calls Distributed Through a Queue
When a call is distributed via a queue, the display format is:
1st line: The name and number of the caller or recipient.
2nd line: The name and number of the distributing queue.
3rd line: The start and end date of the call.
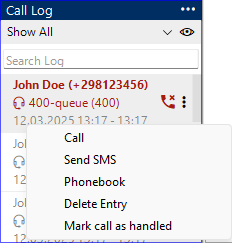
The log shows calling/called number, date, start and end time of the call. You can right-click an entry and choose between:
Call - call the selected entry
Send SMS - send sms to selected entry
Phonebook - you can add the entry to the Phonebook
Delete Entry - delete entry from the Call Log (Note this option is not available if it’s an ended call)
Mark call as handled - Mark an unanswered queue call as handled by me
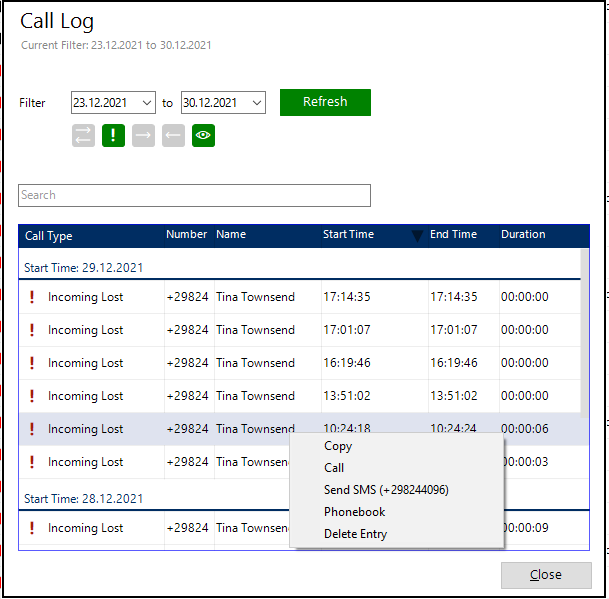
If you want to see entries that are logged since startup or older than seven days you can click the ellipsis icon (3 dots) in the upper right corner of the Call Log. By clicking this, an expanded Call Log window will open where you can search entries with the Search field and within a date range.
When you have found your entry in the log you can right click the entry and choose between the following options:
Copy - e.g. copy the list to MS Excel
Call - call the selected entry
Send SMS - send sms to selected entry
Phonebook - you can add the entry to the Phonebook
Delete Entry - delete entry from the Call Log (Note this will not remove it from the ended calls)
Mark call as handled - Mark an unanswered queue call as handled by me