Contacts
Contacts List
The contacts view enables the user to search for a number or name and to make a call to numbers in the result list.
Note
Press F7 or click Contacts in the toolbar and the Contacts dialog appears
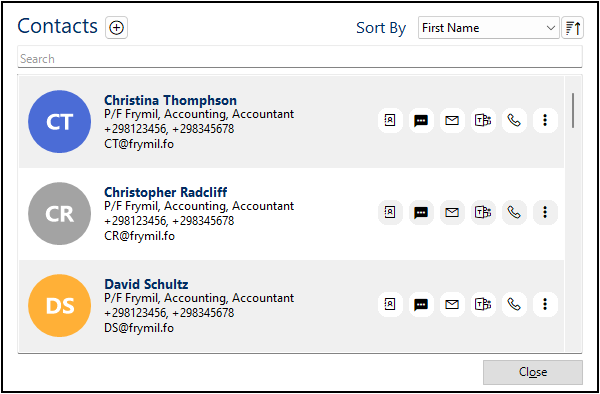
You can search in the following properties: First Name, Last Name, Company, Deparment, Phone number, Mobile number and E-mail address.
- You can sort by: First Name, Last Name, Company and Recently Added.
Beside the sorting options, there is a button to change the sort order between ascending and descending.
Highlight a user in the result list, to mark the user’s number as target number. If it is done from the switchboard, the user’s number is copied to the “Number field” and you can use the functions like transfer, call and consult.
Modify entries in the Contacts view by using the Add, Change and Delete buttons.
- For each contact there are 6 buttons:
Copy Contact Id: Copy the contact’s ID.
Send SMS: Send an SMS to the contact.
E-mail: Send an e-mail to the contact.
Teams: Start a Microsoft Teams chat/call with the contact.
Call: Make a call to the contact.
Context Menu: Popup to show more options, such as show caller history (if permitted), edit and delete.
Note
Show Caller History is only available for switchboard and contact center users, and when the contact is not a employee.
Note
For registered contacts info to be visible in Totalview, when receiving or making a call, the registered phonenumber must start with +contrycode, and can not contain any space.
Contact Details
The contact details view provides detailed information about a contact, including their name, Contact ID, company, department, job title, work and personal phone numbers and e-mail addresses, Microsoft Teams information, and notes.
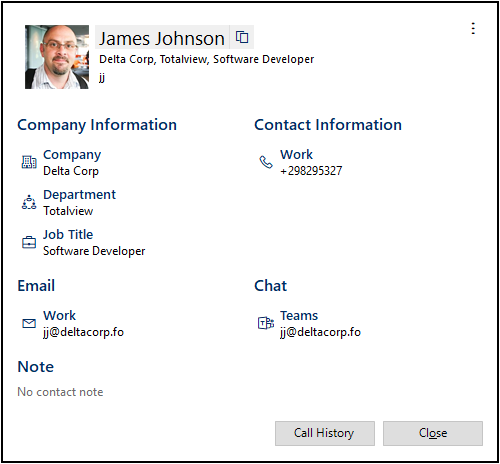
It is possible to perform the same actions as in the contacts list view, such as sending an SMS, e-mail or Teams message, and making a call by clicking the corresponding contact details buttons.
The caller history button will be available in the contact details view if the contact is not an employee. Clicking the button will open the caller history dialog, where you can see the call history for that contact.
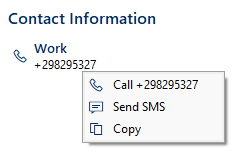
All fields also support copying by right clicking the field and selecting Copy from the context menu, or clicking the copy button if available.


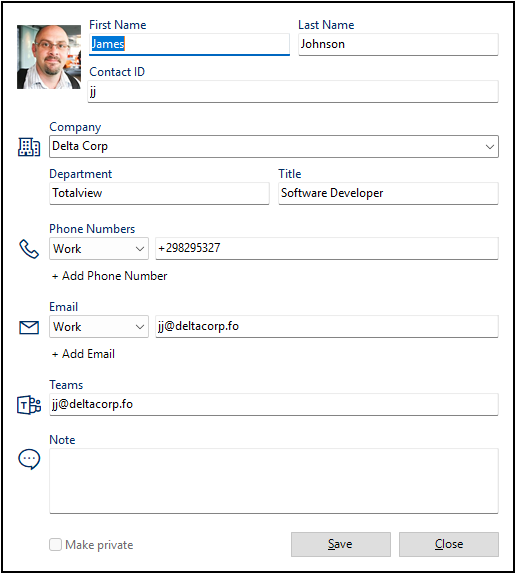
To modify the contact details, click the three dots button in the top right corner of the contact details view and click edit. This will open the edit contact dialog, where you can change the contact’s information.
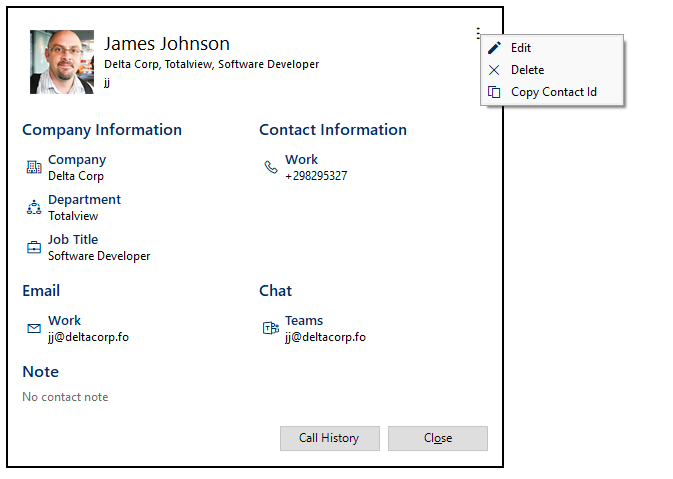
When the edit button is clicked, the contact details view will change to edit mode, where you can modify the contact’s information. After making the desired changes, click the save button to save the changes or click the close button to discard the changes.
Note
Some contacts may have been created by other users, if so you will not be able to toggle the private contact option. If you want to make the contact private, you will need to create a new contact and select the private contact option.