Appointments
Appointments are a user’s expected presence sometime in the future. When the start time of an appointment is reached, and the appointment does not conflict with the current presence, the appointment information is used to set the current presence of the user.
Create appointment
Press F6 or click Make Appointment in the toolbar and the Make appointment dialog will appear. The user now has to specify, which presence state the user will have during the appointment.
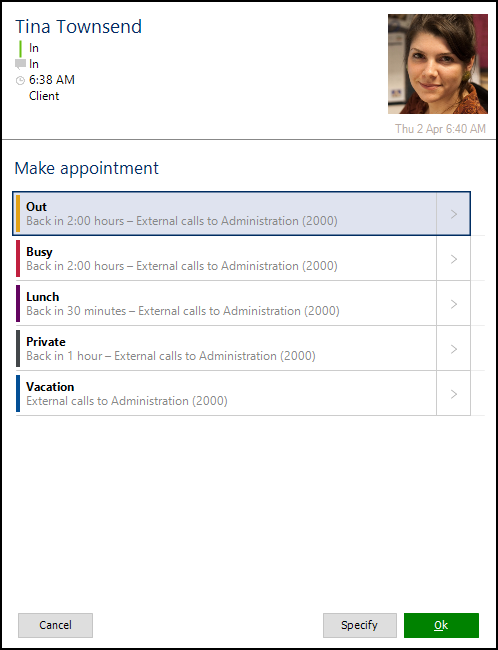
After having selected the state, the user needs to specify additional information such as Message (might be required depending on settings), start and end time etc.
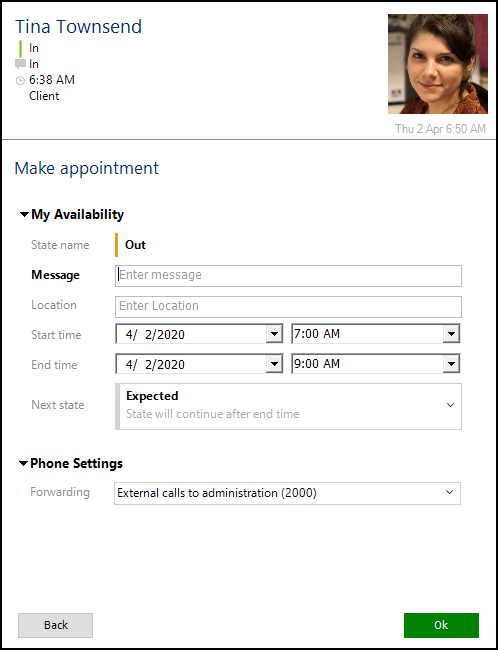
For more information about presence settings, see The presence information.
If external calendar synchronization is enabled, the appointment will be created in the calendar system, if the appointment State class is of the type OOF or Busy (See The External Calendar Integration)
An appointment is not activated if the user’s current presence does not allow appointments to override. See the Totalview Admin guide for more information.
Modify appointment
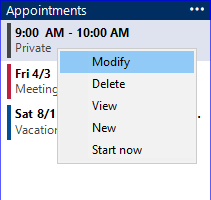
To modify an appointment, right-click on the appointment item in the Appointments list and select Modify.
Modify the appointment information and select OK.
If external calendar synchronization is enabled, and the appointment exists in the external calendar, then the appointment will be updated in the calendar system (See The External Calendar Integration)
It is not possible to modify recurring appointments synchronized from Lotus Notes.
Start appointment
You can use the appointment settings as new current state.
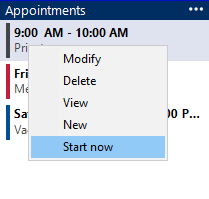
You can choose to create a new current state based on the appointment settings.
The end time for the current state will be set to the start time of the appointment. Other information, such as State, Description and Location will be copied to the current state
Delete appointment
To delete an appointment right-click on the appointment item in the Appointments list and select Delete.
Appointments can also be deleted by selecting delete in the Modify appointment screen.
If external calendar synchronization is enabled, and the appointment exists in the external calendar, then the appointment will be deleted from the calendar system. (See The External Calendar Integration)